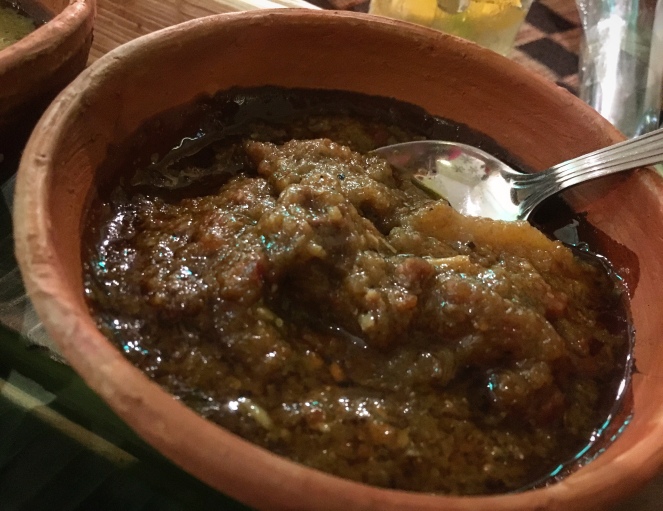
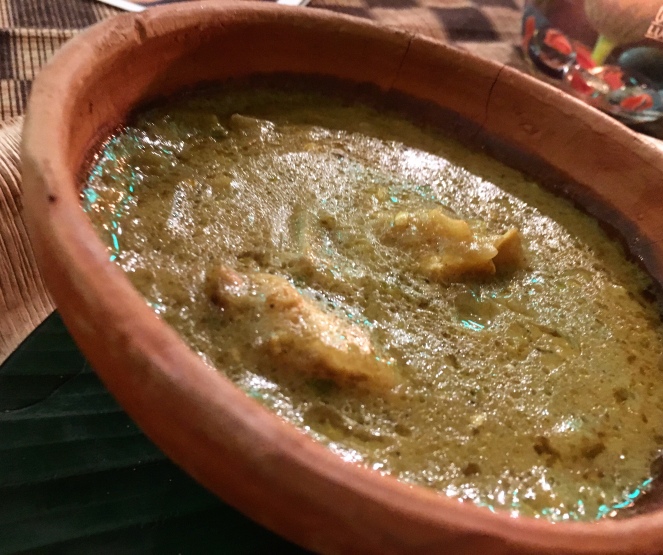
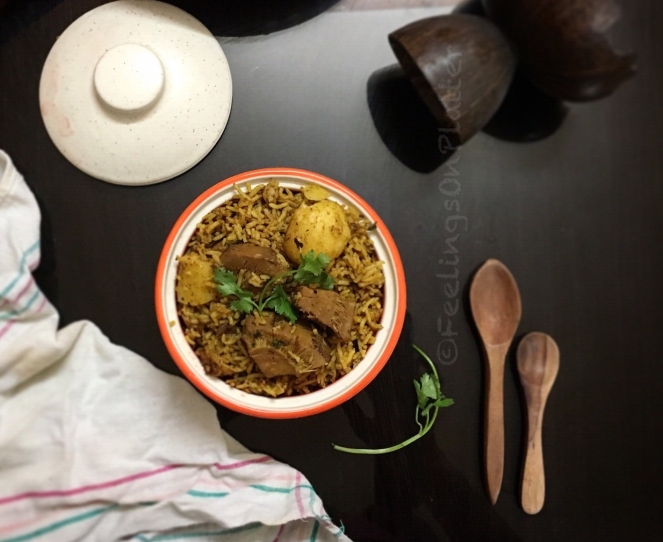
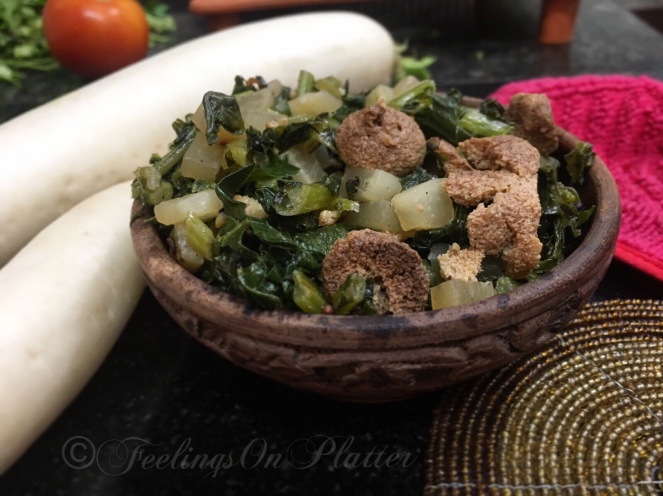
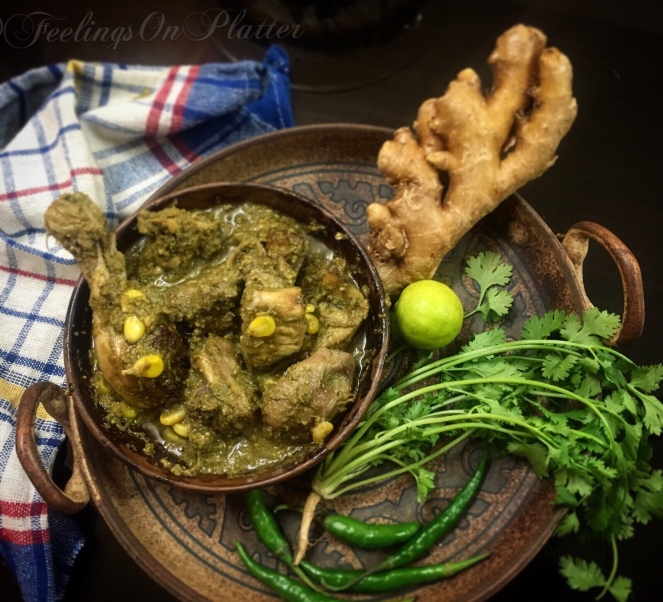
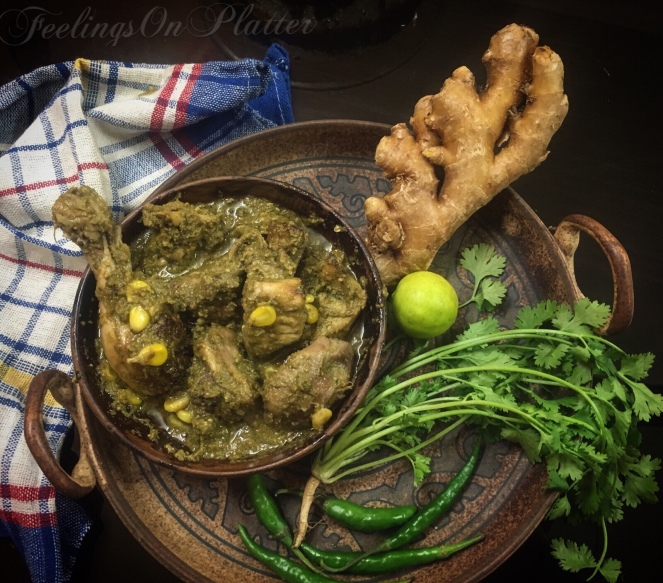
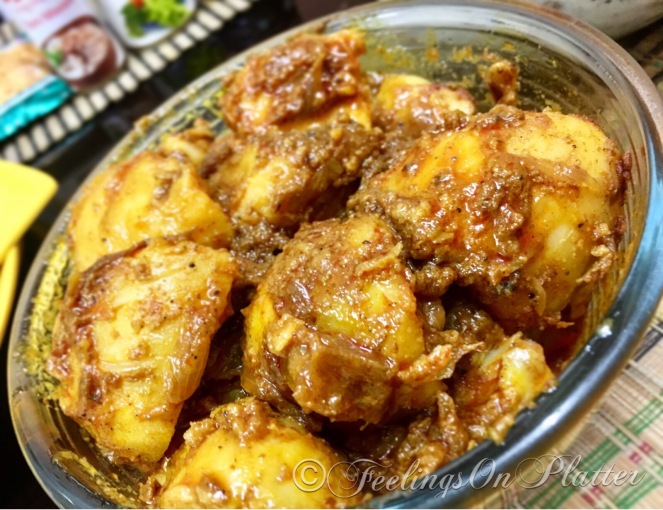
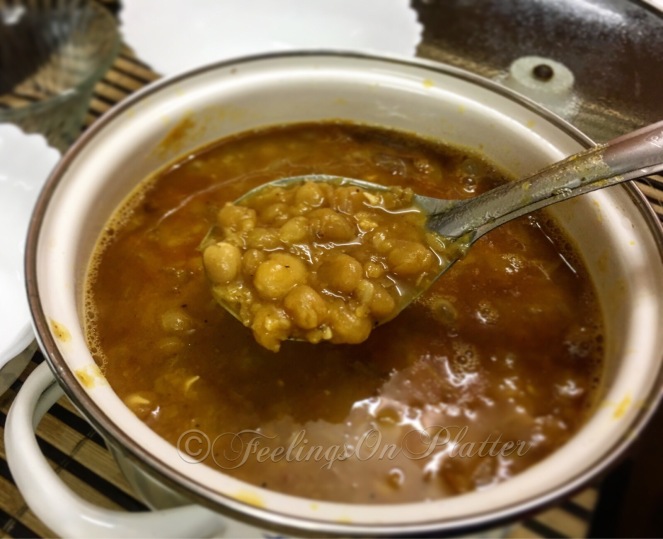
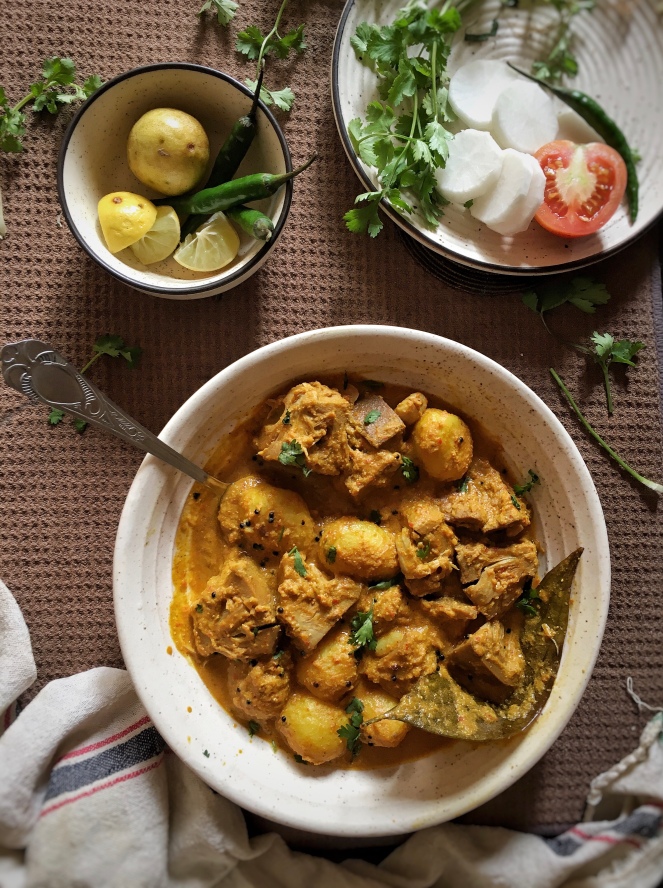
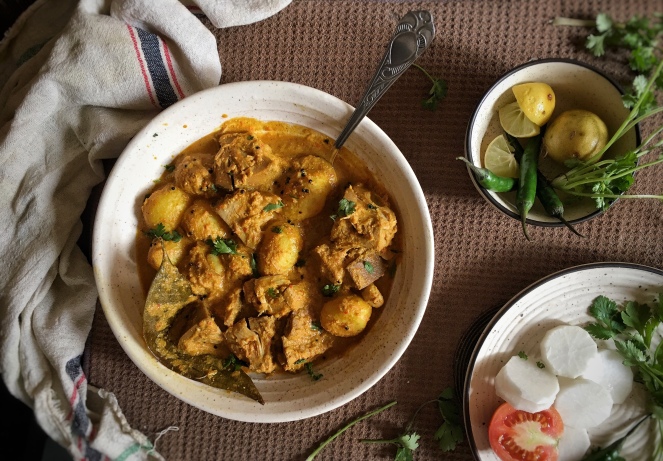
I call “Jackfruit & Baby Potato Curry” a fuss free, gourmet dish which takes very little time to cook. The best part about this delectable curry is, it’s cooked without onion and garlic and appeals to the everyone’s taste buds. Have it with rice or roti, paratha or kulcha, (Variants of Indian flat breads), this curry is pure addiction.

Last summer, when I cooked this curry for the first time, it was more of an experiment of sorts. More or less a calculated one I’d say, for I somehow knew that the flavouring wouldn’t disappoint. And, it didn’t! As a matter of fact, we all liked it so much that the taste lingered in our taste buds for days together. That’s when I knew, I just have whip this curry up again and share the recipe on my blog.
Soon after, I cooked this curry again with super enthusiasm and excitement. My happiness however, was short lived this time when the potatoes that came out of the pressure cooker were overcooked in spite of the usual pressure. Though the curry tasted good, I couldn’t take proper pictures for the blog (Recipe I had jotted down). The disheartenment was huge because summer was getting over and so were jackfruits from the market. It took me some serious consoling from bae, to be out of that dismay.
Fortunately, I didn’t have to wait for the whole year like I apprehended earlier. I was over the moon when bae, one day, managed to get it from the market in the middle of the winters. I literally waited for months together to rustle this delight up for the blog. Imagine the happiness when I got jackfruits when I least expected it!
A few days have been passed since I cooked this Jackfruit & baby potato curry but couldn’t publish it a little earlier when onion prices soared a new high all across India. So much so, people almost stopped using onions. Albeit, the price now is still a little on the higher side, the situation is much better. Now, how can you not be at ease and happy , if you can make a gourmet-ish curry without using onion-garlic in a very less time. Trust you me folks, this curry is all of that and much more.
Read on for the recipe!
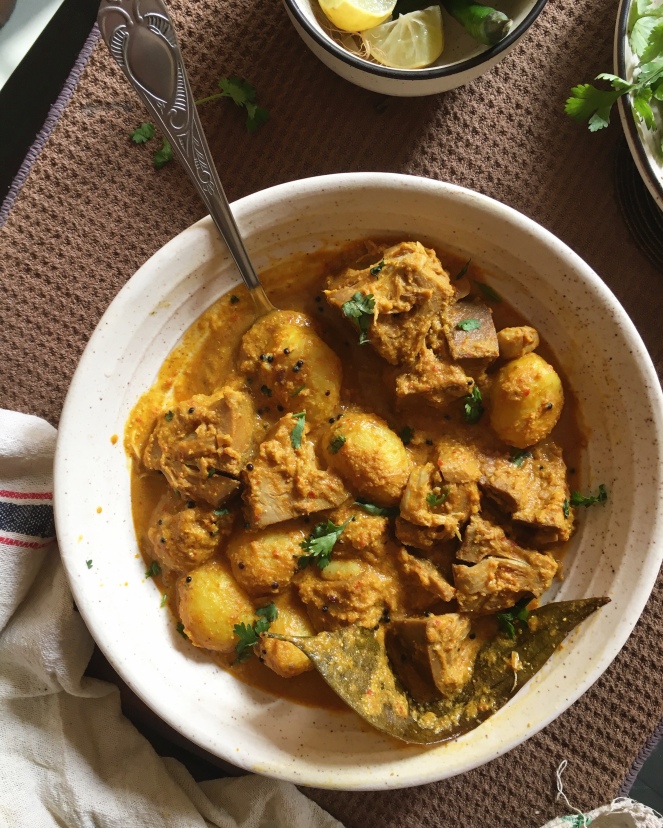
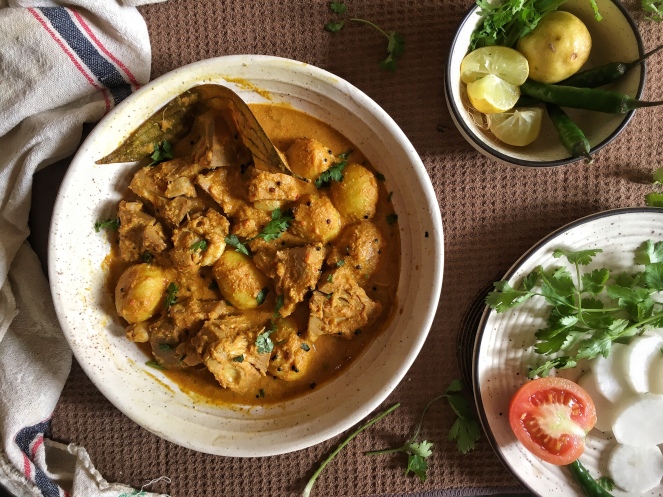
Jackfruit & Baby Potatoes Curry


Ingredients Required:
For the paste:
- 2 tablespoons full of melon seeds
- 2 teaspoons cumin seeds
- 3 dry red chillies
(Blitz them all together to make a fine paste)
Other Ingredients:
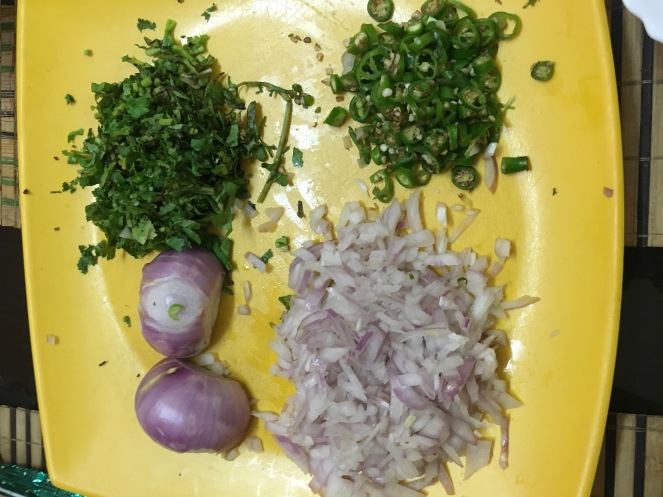
- Grated ginger – 1 teaspoon
- Mustard seeds – 1 teaspoon
- Jackfruit – 300 gms
- Baby Potatoes – 8
- Veg Oil – 4-5 tablespoons
- Bay leaf- 1 medium size
- Tomato purée – 1 medium sized
- Turmeric powder – 1/2 teaspoon
- Kashmiri red chilli powder- 1 teaspoon
Method Of Cooking:
- Cut the jackfruit in cube size and wash it properly along with the baby potatoes. Add water, salt and turmeric powder in the pressure cooker and add the jackfruit and potatoes in it. Pressure cook it for 2 whistles in high flame ( It’s always advisable to give pressure according to your cooker quality).
- Heat oil in a wok/ pan and once hot, add bay leaf and mustard seeds in it. Once the mustard seeds splutter, add grated ginger and sauté for 1 minute.
- Now add the paste (dry red chillies, melon seeds and cumin seeds) in the pan and sauté.
- Add turmeric powder, Kashmiri red chilli powder and a bit of salt in it and mix well. Cook for about 10 minutes or till the oil start separating.
- Now add the boiled / pressure cooked baby potatoes and jackfruit in the gravy and mix it well. Put the lid on and let it cook for about 5-7 minutes.
- Add a bit of water in the gravy, mix well and again let it cook for some time till the jackfruit and potatoes soak in all the flavours.
- Once done, transfer it in a bowl and garnish the curry with chopped coriander leaves. Relish with steamed rice or rotis.
This curry gets done very quickly and hence, a perfect dish to rustle up for guests for it tastes no less than a gourmet dish. Also, people may have a hard time to figure that this curry cooked without onion and garlic. Take my words, this curry will be loved by all kinds of people.
I totally totally heart this Jackfruit & Baby Potatoes Curry and can relish it with both steamed rice and rotis or parathas. Honestly, parathas are a great combo. Since summers are not far away, I can guarantee that this curry is going to be cooked regularly at home. You make this easy peasy curry too and tell me how did you like it.
Till then, Happy Munching & Keep Smiling! Tada!
Love,
Shobhna